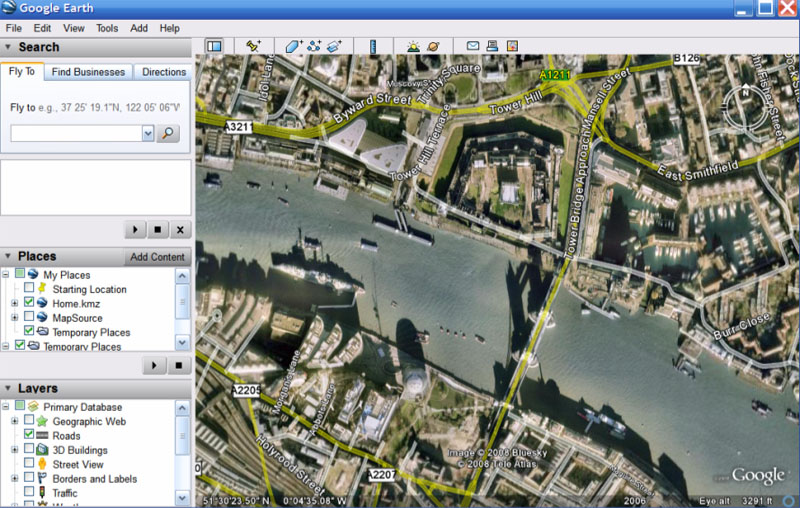
| There are various schools of thought when it comes to creating your own GPS routes: City Navigator, Topo, OS mapping, etc, etc. Each of these have their own proponents, and you can read the arguments on pretty much any cycling forum. In my view, the Rolls-Royce of GPS route-creation is to create the route in Google Earth. The reason for this is that you can view the actual terrain in the form of aerial photos. This tutorial shows you exactly how to do it, step by step. You will needTo use the approach I describe here, you'll need: - a Garmin GPS with Mapsource software The reason you need City Navigator on DVD rather than SD card is that this allows you to use it on both your PC and in the GPS - the SD card mapping can only be used in the GPS unit. Oh, and don't worry about the fact that Tyre talks about TomTom rather than Garmin - it is compatible with Garmin models too. TerminologyRather confusingly, GE and Mapsource use different terms for the same things. Points we mark on a map are Placemarks in GE and Waypoints in Mapsource. Routes created by joining the dots are Paths in GE and Routes in Mapsource. I will use the terminology for the software we're using at the time. Getting startedIf you're new to Google Earth (GE from now on), I can only assume you've been living in a remote rainforest for the past few years, but as I'm aiming to make this tutorial suitable for complete beginners, I explain all the steps. However, it's really worth taking some time later to explore GE - it's one of the coolest pieces of software ever. Open Google Earth: |
|
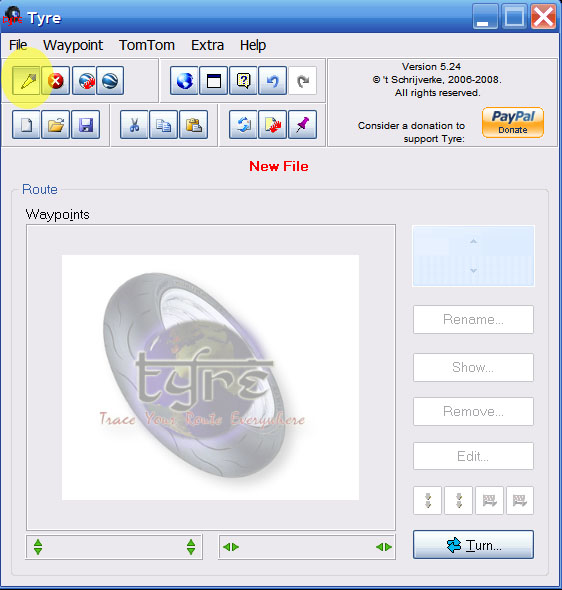
Open Tyre, and click the Activate button (highlighted below in yellow): |
|
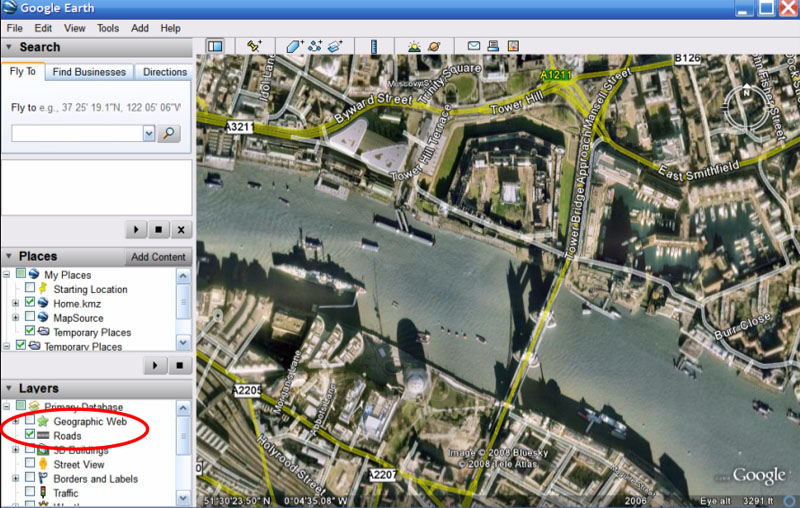
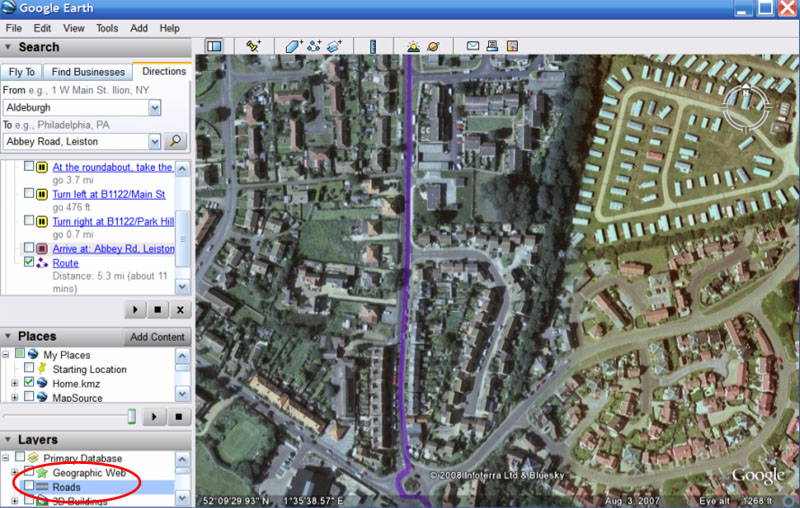
That's all we need to do with Tyre for now, so back to GE ... In Layers, make sure Roads are ticked: |
|
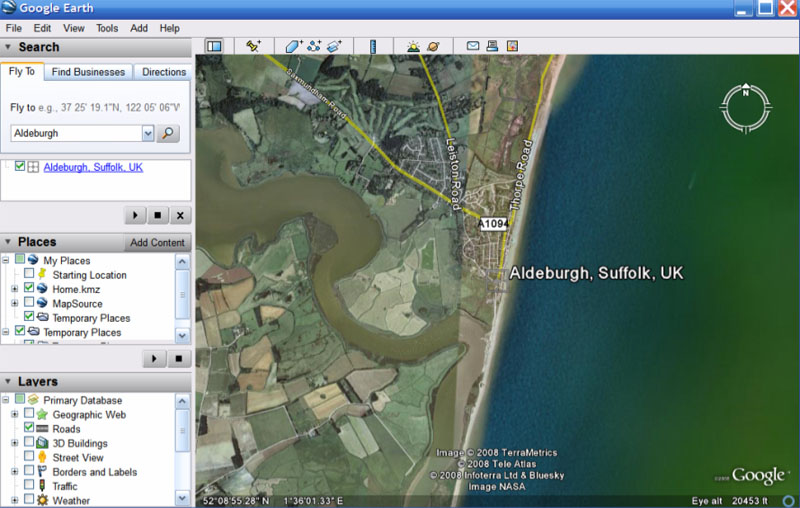
For the purpose of this demo, we're going to navigate from Aldeburgh to Abbey Road in Leiston. As we're currently looking at Tower Bridge in London, we first need to navigate GE to Aldeburgh. To to this, just type Aldeburgh in the Fly to box and click the magnifying glass. GE will then fly to Aldeburgh: |
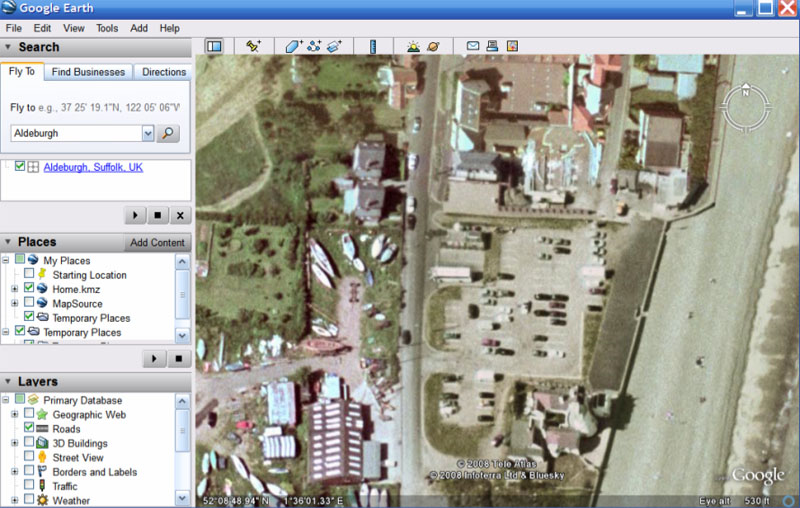
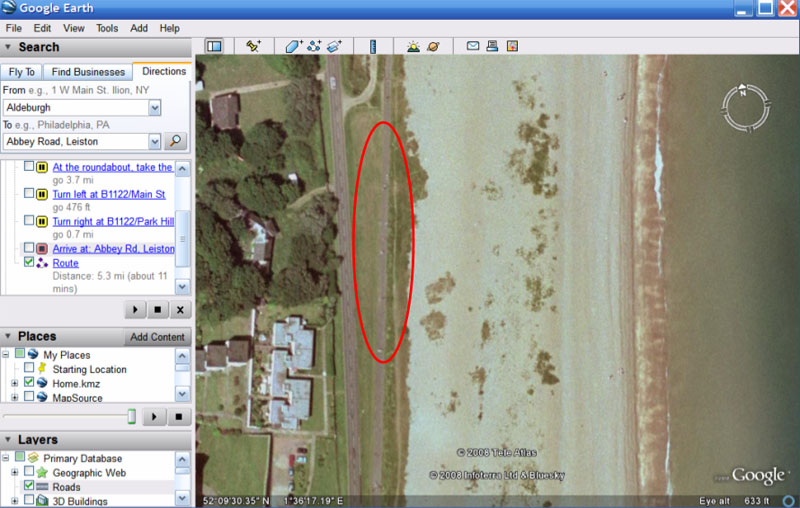
Basic Google Earth controlsIf you're new to GE, the basic controls are: [-] Zoom out Create an automated route as a guideAlthough we're going to use GE to choose our own route, we'll start by letting GE create an automated route. This will provide a purple line to indicate the path we're aiming to track, though we'll deviate from it, zig-zag across it, etc, as required to create a pleasant route. We begin by marking our start point. Use the above controls as required to identify your start-point. In this case, we want the exit to the car-park by what was once the coastguard site. We want to zoom in quite a lot, so we can clearly see the road we want: |
|
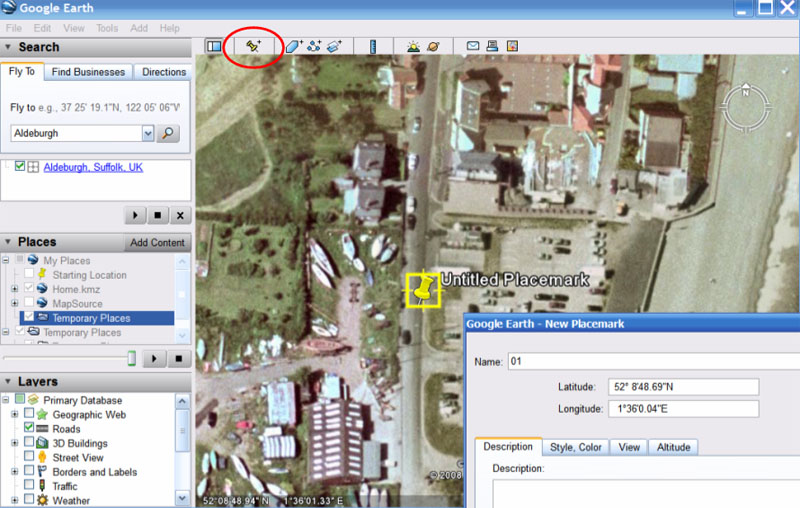
We position a Placemarker to mark our startpoint. To position a Placemarker, click the map-pin symbol (circled in red) and drag the yellow map-pin to where you want it. When you have it positioned in the right place, click in the Name field and give it a name. Here I'm just calling it 01, but you might want to choose a more meaningful name in real use: |
|
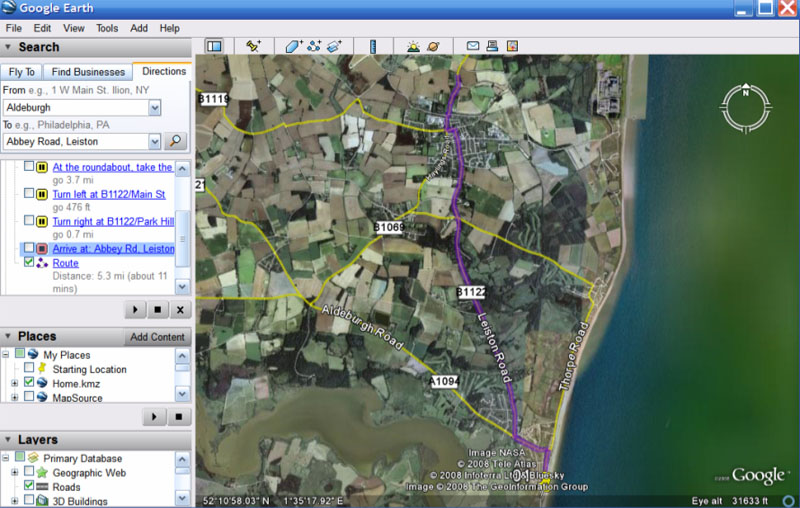
I'll give you some tips about positioning Placemarks in a moment. Next we'll ask GE to plot an automated route from Aldeburgh to Leiston. To do this, click the Directions tab, enter our start and end-points and click the magnifying-glass. GE is very flexible in terms of what you can enter in these fields. Examples are place names, roads, addresses and postcodes. For details of additional options, see here. GE will then calculate a route, and show it in purple, together with text overlays with directions: |

|
We don't need the directions, and they clutter up the screen, so we're going to switch them off by unchecking all the boxes under the destination except for the Route box: |
|
Now we're going to explore GE's route to see what we think of it. To see the terrain more clearly, you might want to temporarily uncheck the Roads layer - but remember to switch it back on again afterwards: |
|
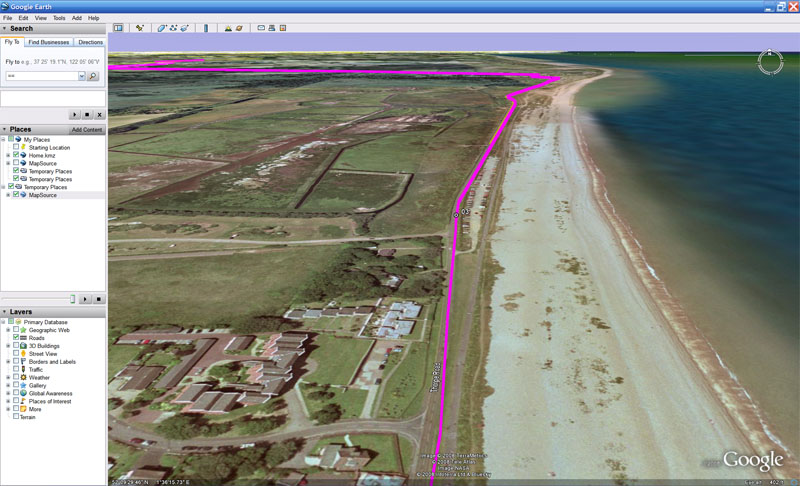
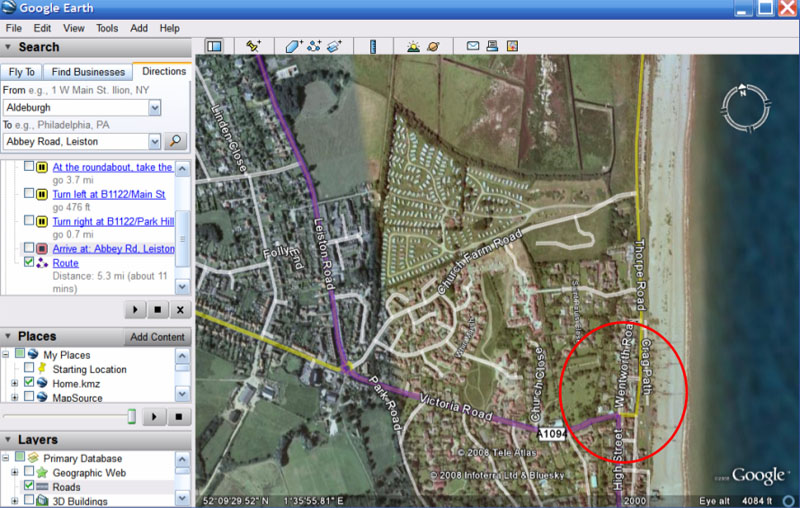
To explore the route, use the GE controls above to follow it, and zoom in as required to get a good idea of what it's like. In this case, we've done that and decided the GE route is (a) a bit urban and (b) takes us away from the sea too soon. We thus explore parallel routes, again zooming in as required. In this case we've spotted a nice-looking coast road, and zooming in even appears to show a bike path: |
|
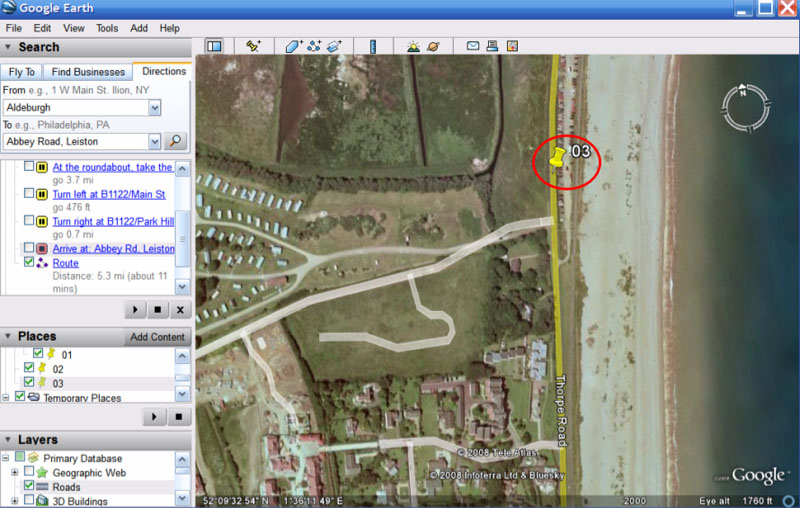
Zooming back out, we look for the first point where we want to deviate from the suggested route - circled here in red: |
|
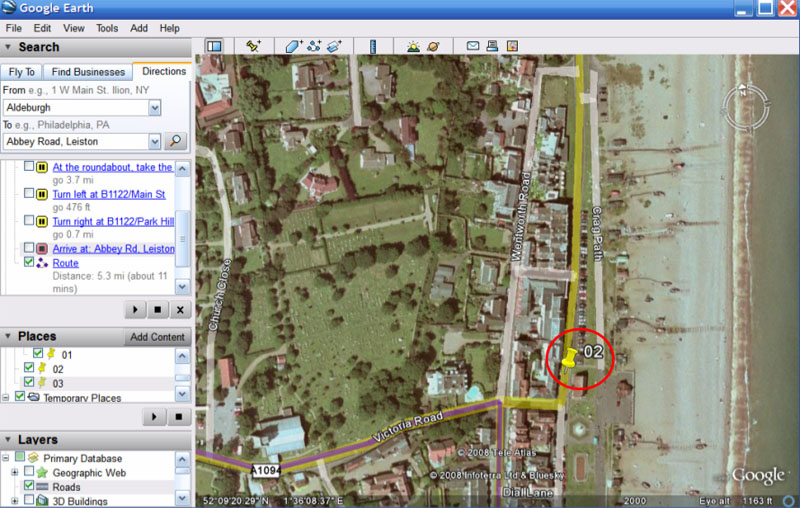
Now we zoom right in, make sure the Roads layer is switched on again and position a second Placemark. We are using the Placemark to show Mapsource which road we want to take instead of the suggested (purple) one. (Yes, I know we're in GE at the moment, but it's Mapsource which will later be making use of our Placemarks to create the route.) Now, positioning of Placemarks is important, and there are several things to bear in mind ... First, position them frequently, to ensure the route is created accurately Always put Placemarks on the road overlay (coloured shading) not the satellite image, otherwise Mapsource may think you are marking a field, not a road. This is the reason you need to have the Roads overlay switched on. If the road overlay and satellite image don't line up, the road overlay is the one to use. On dual-carriageways, make sure Placemarks are on the correct side of the road (otherwise Mapsource will plot a U-turn to get you to the other side of the road!). Finally, at junctions, position the Placemark just after the turn, not on the junction (this tells Mapsource which turning you want to take at the junction). So, in this case, the suggested route turns left and we want the coast road, so we position a Placemark on the road we want, after the junction. We've taken care to position it on the shaded yellow road overlay: |
|
Now, remember that the suggested route is off to the left, so it's likely that Mapsource will try to get us back onto that route. For that reason, when we spot a couple of left turns, we position a Placemark just past the junctions to show Mapsource that we don't want to turn left there: |
|
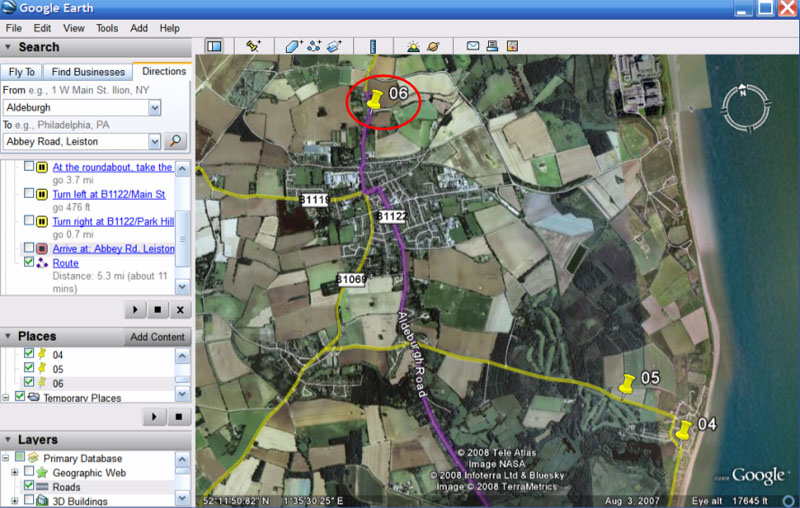
On its own, a single Placemark just past a junction won't be enough, as Mapsource will sometimes just take us to that point and then do a U-turn to take the turning we just passed, but later ones will tell it not to do that. As I say, you don't need to position Placemarks along a straight road, so we're using 4 to show that we want to turn left in Thorpness, and 5 to show it the road we want to exit on (again, I zoomed in to position these accurately on the road overlay, but I'm showing the zoomed-out view here): |

|
We don't care about the route through Leiston, so our final Placemark is at the destination. In this case, we've only entered a road, so the end-point is a bit random; in reality, we'd have entered an exact address and the end of the purple route would be that house: |
|
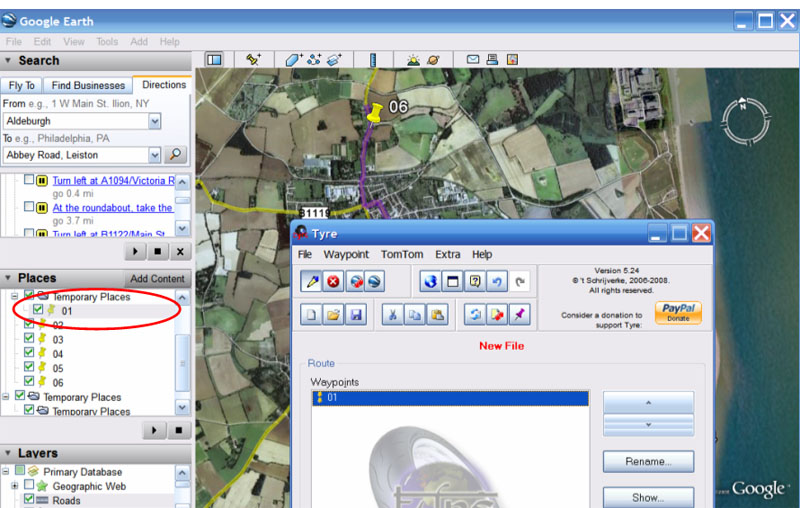
Ok, so far we have our Placemarks in GE. Our next step is to get them into Tyre, which will convert them into a format that Mapsource can understand ... Exporting your Placemarks to TyreTyre is a clever piece of software. As long as GE is open, Tyre watches the clipboard. Every time you copy a Placemark, Tyre automatically grabs it - you don't need to paste, only to copy. You'll see that GE has added yoiur Placemarks to the Places sidebar. Right-click the first one and select Copy. If you now look at Tyre, you'll see that even though you haven't pasted it in yourself, Tyre has already done that for you: |
|
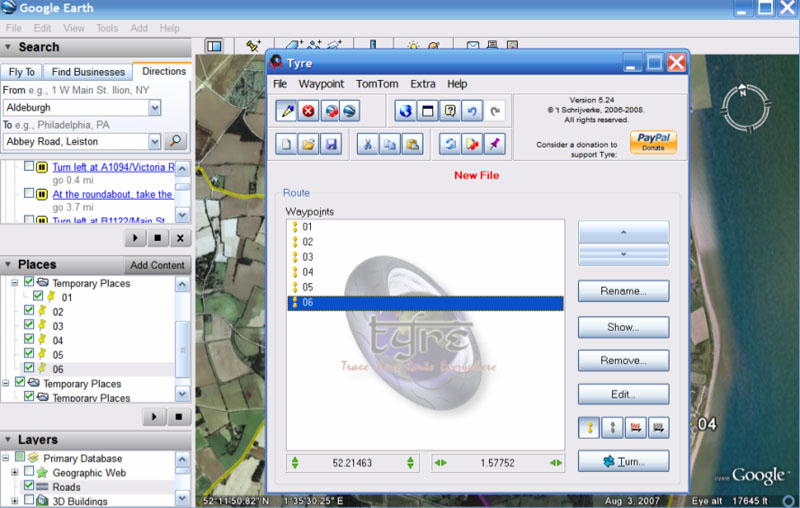
Repeat for the other Placemarks: right-click each in turn, and select Copy. In each case, Tyre will grab it as you do so: |
|
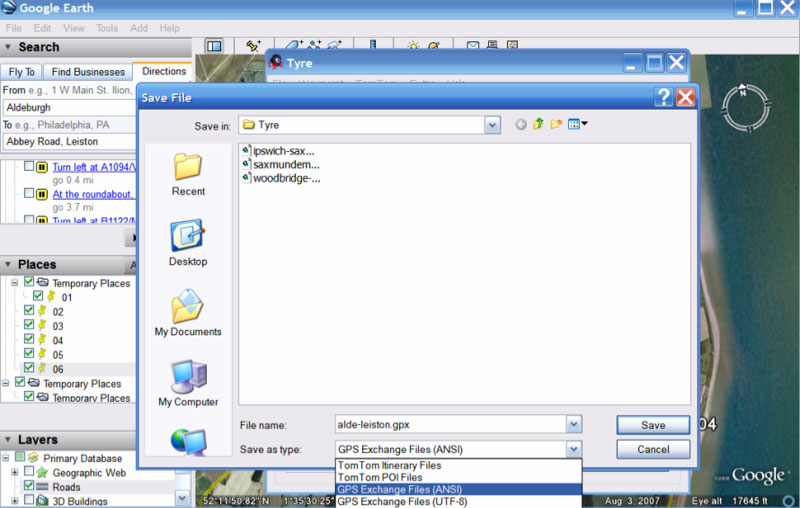
When Tyre has all the Placemarks, we're done with GE, so you can close it if you like. We shall now also switch to the terminology used by both Tyre and Mapsource, so our Placemarks become Waypoints. Our next task is to save the Tyre Waypoints as a GPX file. To do this, go to the File menu and select Save As. Give your file a meaningful name, then in the Save as type drop-down, select GPS Exchange Files (ANSI) then click the Save button: |
|
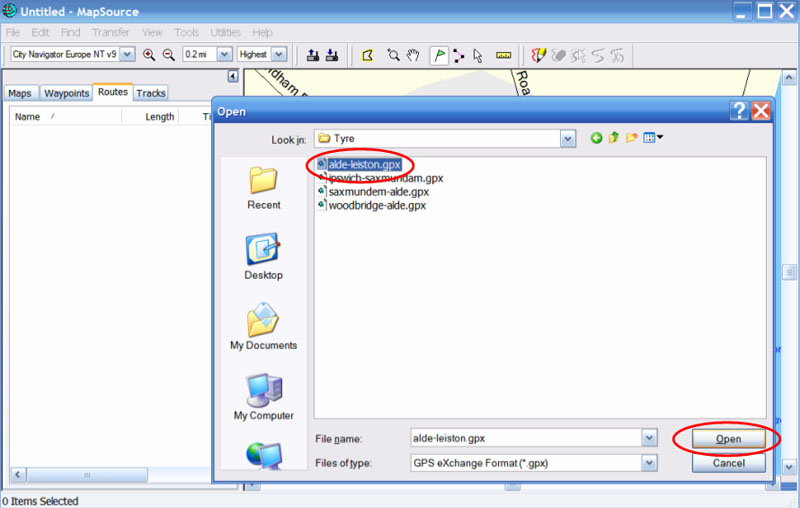
(To make it easy to find these files, I created a Tyre folder inside my Garmin folder and always store the GPX files there.) You now have a GPX file of your waypoints, and we're done with Tyre, so you can close that too. Converting the GPX file to a GDB fileOk, that sounds rather technical I know! You don't actually need to know what it means, so if you couldn't care less, just skip the bit in italics - it's only there in case you're interested ... Google Earth stores things in a file format called KMZ. Mapsource stores things in a file format called GDB. GE can't understand GDB files, and Mapsource can't understand KMZ files, which leaves us with a bit of a problem. There is a universal GPS file format called GPX. If GE was perfect, it would be able to export data in GPX format. As it doesn't yet do this, we need some software that speaks both KMZ and GPX. That software is Tyre. Tyre accepts the KMZ data from GE, and converts it into a GPX file. Mapsource then reads the GPX file. Once we've opened the GPX file in Mapsource, we can convert it to the standard Mapsource file format, GDB. Open Mapsource, and from the File menu select Open and then select the GPX file we saved in Tyre: |
|
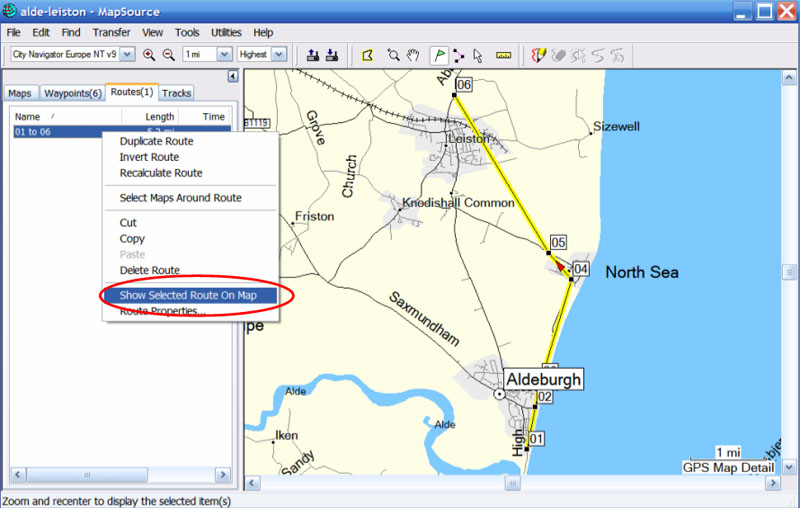
Click the Routes tab, and you'll see your route. Right-click the route and select Show selected route on map: |
|
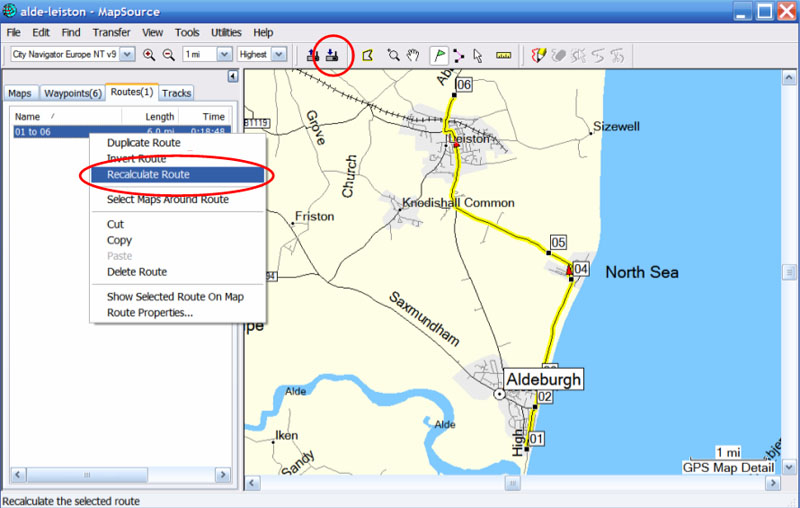
As you can see, all we have so far is a set of straight lines connecting our waypoints - the route is ignoring the roads. Our final step is thus to convert it to a proper route and save it as a GDB file. Right-click the route again, and this time select Recalculate route. Once Mapsource has finished doing this, you will have your final route, now following the roads: |
|
Press CTRL-S to save the file as a GDB file. To send the route to your GPS, plug it in and then click the usual 'send to GPS' button (highlighted above). If you're organised like me, and like to keep all your maps, waypoints, routes and tracklogs all in one file (actually, two files: one for the car GPS and one for the bicycle GPS), then right-click the route again and select Copy. Open your standard file, click the Routes tab, click anywhere in the blank space below the existing routes, right-click and select Paste. Your new route has now been added to your collection. The above is rather a lot of steps, and it might sound quite complicated the first time you do it, but it's actually pretty straightforward once you've done it two or three times. I hope the tutorial proved helpful! |
| www.benlovejoy.com | Cycle | Kit | Google Earth GPS tutorial |
Copyright © Ben Lovejoy 1990-2008 | Email me | Bookmark
this site |